Showing posts with label Recipe. Show all posts

Saturday, 1 December 2012

Pumpkin: Tis the Season ...Part 3

Pumpkin Soup

This recipe is from BBC Good Food

Ingredients

  • 4 tbsp olive oil
  • 2 onions , finely chopped
  • 1kg pumpkins or squash (try kabocha), peeled, deseeded and chopped into chunks
  • 700ml vegetable stock or chicken stock
  • 142ml pot double cream
  • 4 slices wholemeal seeded bread (if like me you don'e like croutons in your soup skip the bread)
  • handful pumpkin seed from a packet
Prepartion

  1. Heat 2 tbsp olive oil in a large saucepan, then gently cook 2 finely chopped onions for 5 mins, until soft but not coloured. Add 1kg peeled, deseeded and chopped pumpkin or squash to the pan, then carry on cooking for 8-10 mins, stirring occasionally until it starts to soften and turn golden.
  2. Pour 700ml vegetable stock into the pan, then season with salt and pepper. Bring to the boil, then simmer for 10 mins until the squash is very soft. Pour the 142ml pot of double cream into the pan, bring back to the boil, then purée with a hand blender. For an extra-velvety consistency you can now push the soup through a fine sieve into another pan. The soup can now be frozen for up to 2 months.
  3. While the soup is cooking, slice the crusts from 4 slices of wholemeal seed bread, then cut the bread into small croutons. Heat the remaining 2 tbsp olive oil in a frying pan, then fry the bread until it starts to become crisp. Add a handful of pumpkin seeds to the pan, then cook for a few mins more until they are toasted. These can be made a day ahead and stored in an airtight container. Reheat the soup if needed, taste for seasoning, then serve scattered with croutons and seeds and drizzled with more olive oil, if you want.
 

Thursday, 29 November 2012

Pumpkin: Tis the Season... Part 2

Salted Pumpkin Seeds

Ingredients

Serves: 4
  • 150g (5 oz) pumpkin or squash seeds
  • 1 tablespoon olive oil
  • 1/2 teaspoon salt, or to taste

Preparation method

Prep: 10 mins | Cook: 15 mins

Tuesday, 27 November 2012

Pumpkin: Tis the Season for.. Part 1

This is a recipe that I reccently tried with a friend who was suffering with a serious case of Massive Pumpkin Syndrom, MPS if not dealt with quickly can result in Pumpkin rot which is equally distressing.

Pumpkin Pie


The recipe that we used is from the BBC's Saturday Kitchen and the chef was Antony Worrall Thompson who is one of my favourite chefs.

Please note that we proudly used a shop bought sweet short crust pastry case.

Ingredients

For the pastry
  • sweet short crust pastry case (or a packet of ready made sweet short crust pastry with 40g/1½oz crushed pecans mixed in.)
For the filling
  • 450 g/1lb prepared weight pumpkin flesh, cut into 1in/2.5 cm chunks
  • 2 large eggs plus 1 yolk (use the white for another dish)
  • 3 oz/75g soft dark brown sugar
  • 1 tsp ground cinnamon
  • ½ level teaspoon freshly grated nutmeg
  • ½ tsp ground allspice
  • ½ tsp ground cloves
  • ½ tsp ground ginger
  • 10 fl oz/275 ml double cream

Preparation method

  1. Pre-heat the oven to 180C/350F/Gas 4.
  2. Use a shop bought sweet crust pastry case, about 9 inch/23 cm diameter and 1½ inches/4 cm deep.
  3. To make the filling, steam the pumpkin then place in a coarse sieve and press lightly to extract any excess water.
  4. Then lightly whisk the eggs and extra yolk together in a large bowl.
  5. Place the sugar, spices and the cream in a pan, bring to simmering point, giving it a whisk to mix everything together. Then pour it over the eggs and whisk it again briefly. (Your kitchen will start to smell so good that you may be temped to lick the spoon, I was).
  6. Now add the pumpkin pureé, still whisking to combine everything thoroughly.

    Top Tip: If you puree is not that smooth it will make everything lumpy so throw everything into a blender or use a hand blender to solve that problem.

  7. Pour the filling into your pastry case and bake for 35-40 minutes, by which time it will puff up round the edges but still feel slightly wobbly in the centre.
  8. Remove the pie from the oven and place the tin on a wire cooling rack. Serve chilled (stored loosely covered in foil in the fridge) with some equally chilled créme fraïche, but warm or at room temperature would be fine.

Tuesday, 9 October 2012

How slow is Sloe Gin really?

Last year, I was not organised enough to make my own Sloe Gin, not so this year! On Sunday, I went to the Alexandra Palace's Farmer's Market, I know it's a cheat to buy them. But to be honest I'm a city girl and only really comfortable foraging blackberries and the like. Maybe next year.


Making sloe gin is pretty quick to start and slow to finish but not laborious, think of the turtoise and the hare and you're on the right track. There's no cooking required, just patience as the sloes steep in the gin.

You will need:

-450g/1lb sloes
-225g/8oz caster sugar
-1 litre/1¾ pint gin
- A large sterilised jar or bottle
- A sterilised needle
- A funnel
- Measuring Scales

Preparation method:

-Prick the tough skin of the sloes all over with a clean needle and put in a large sterilised jar. (My advice use something that can hold atleast 2ltr with a wide neck, I didn't and may pay for that later. I used a 1 1/2ltr bottle and could only get half of the gin in the bottle so I will have to leave it alone for that first week, then transfer the whole mixture to something bigger).
-Pour the sugar in through the funnel and use the gin to wash it through the funnel spout, seal tightly and shake well.
-Store in a cool, dark cupboard and shake every other day for a week. Then shake once a week for at least two months.
-Strain the sloe gin through muslin into a sterilised bottle.

 I will be trying to update this post with photos after each shake.

 Top recipe tip to try as well:

You can make blackberry brandy in the same way, substituting blackberries for the sloes and brandy for the gin. Blackberries do not need pricking. If I have time in the next couple of weeks, I will try this tip.

TTFN

 MagpieSpirit

Tuesday, 2 October 2012

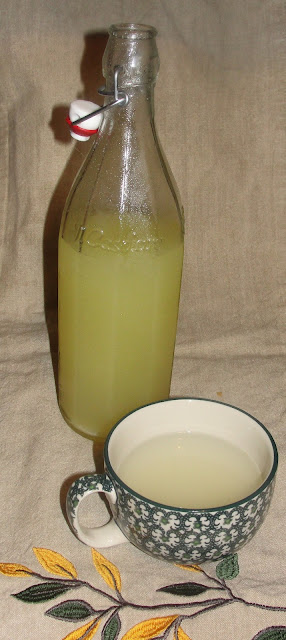
Ooh it's getting cold outside...time for some home-made ginger cordial

As the weather starts to cool, the skies seem more grey than blue, we all know that our first winter cold is about to make itself known. My home-made ginger cordial isn't a cure all but will warm you from your core and only takes about 30 minutes to make.

Try it and let me know what you think.

Ingredients :~ Makes 350ml approx but this recipes doubles easier
  • Rind of 1 unwaxed lemon
  • 150g golden caster sugar
  • 240ml water
  • 3 inch (generous chunk) piece of ginger peeled and chopped finely (or cheat and throw in the blender with the water)
  • 2tsp cream of tartar
  • 50ml fresh lemon juice

    Step 1. Peel the rind off the unwaxed lemon making sure you remove any of the white pith and put in a heavy based saucepan.

    Step 2. Add the water, ginger, cream of tartar and the sugar last.

    Step 3. Turn up the heat to bring to the boil and stir until the sugar has dissolved.

    Step 4. Take off the heat and add the lemon juice.

    Step 5. Bring back to the boil then strain the mixture through a fine sieve or muslin into a bowl and set aside to cool.

    Step 6. When cool, pour into a sterilised bottle jar (I used a bottle that originally contained olive oil).

    Keep refrigerated and use within 2 weeks .

    I got this recipe from how to cook good food.

    Enjoy,

    TTFN

    MagpieSpirit

Tuesday, 25 September 2012

Food Glorious Food

I would really like to  take full credit for this beautiful spread but I wasn't the cook but one of those invited to taste test . With that said I did remember to get the recipes...once I actually asked for them.


Herby Tomatoe Salad
6 tomatoes 
1 medium red onion
Dressing
Big hand full or parsley and coriander minced.
2 cloves of garlic minced, 
Good glug Balsamic viniger
Good glug of Olive oil

Squash Salad
1 butternut squash , peeled and cut into long pieces
1 tbsp olive oil
250g pearl barley
300g Tenderstem broccoli , cut into medium-size pieces
100g SunBlush tomatoes, sliced
1 small red onion, diced
2 tbsp pumpkin seeds
1 tbsp small capers, rinsed
15 black olives, pitted
20g pack basil, chopped
Dressing 
5 tbsp balsamic vinegar 
6 tbsp extra-virgin olive oil
1 tbsp Dijon mustard
1 garlic clove , finely chopped

Pepper Parcels
½ red onion, peeled and cut into wedges
4 baby courgettes, halved and sliced
16 small cherry tomatoes
16 small black olives
200g feta cheese
2 tbsp shredded basil
olive oil
4 red peppers , halved, seeds removed

Grilled Portobello
2 tbsp Dijon mustard
1 tbsp balsamic vinegar
2 large portobello mushrooms
2 thick slices beefsteak tomato
2 ciabatta rolls, toasted
2 slices red onion
2 handfuls rocket

Cougette Salad
2 large courgettes
3 tbsp olive oil
1 tbsp lemon or lime juice
1 tbsp clear honey
2 tsp poppy seeds
1 small garlic clove , crushed
salt and pepper , to taste

In my own opinion, I have left the best to last
Schug
1 pound of peppers (you can mix it up, but go red or go green for bright, consistent color)
1 head fresh garlic, peeled
1 1/2 tablespoons cumin
Black pepper and sea salt to taste
Olive oil to cover

Hope you like them. Let me know what you think.

TTFN

MagpieSpirit

Tuesday, 4 September 2012

Plum Chilli Jam

Here's a great recipe that is good on scones, cheese, meat and toast, an all-round jam.

Ingredients :

  • 1kg red plums
  • 500g Preserving Sugar
  • Juice of 2 Lemons
  • 2 Red chillies - mild kind
  • 25g butter
Step 1. Half and stone the plums.

Step 2. Finely slice the chillies. I recommend de-seeding them at this point. Use a teaspoon to scrape the seeds out. Instead of slicing, I used my kitchen scissors.

Step 3. Cook gently until the plum skins are soft.

Step 4. Mix in the sugar, stirring the pan until it has dissolved.

Step 5. Add the chillies and then bring to the boil and boil until the mixture has reached setting point.

Step 6. Add the butter and stir into the pan.

Step 7. Pot into sterilised jars, seal.

At this point you can label or boil jam in jars which creates a firmer jam, then label.

Can be eaten immediately but I recommend leaving for 2 weeks before consuming. You can leave the jars in the fridge for up to 6 months if left unopened.

TTFN

MagpieSpirit

Tuesday, 28 August 2012

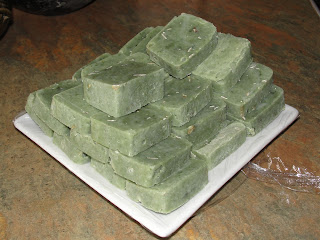
Rosemary Gardener's Soap

Rosemary Gardener's Soap is meant to cleanse and revitalize skin and makes upto 16 bars of soap.


Ingredients:
300ml (1/2 pint) Cheap olive oil
175ml (6 1/2 fl oz) coconut oil
120ml (4 fl oz) cooled, boiled or distilled water
60g (2 oz) caustic soda (lye crystals)
1 tbsp green clay
3 tsp spirulina powder or 4 crushed spirulina tablets
1 tbsp bran, oatmeal or rolled oats
30 drops rosemary essential oil

You will also need some equipment, it's not necessary to purchase a separate set of equipment for soap making, but if you're using cooking equipment, make sure you clean everything extremely well.

-Digital kitchen scale
-Stainless steel / Enamel pot
-2 x plastic spatulas
-Thermometer that register between 38-93 degrees C (100-200 degrees F)
-Spoons / bowls for weighing / measuring
-A good-sized container for mixing the NaOH solution (this should be reserved for you soap-making only).
-Hand blender (optional)
-Plastic or wooden mould
-A little oil and greaseproof paper for lining the mould
-Blanket or large towel
-Rubber gloves
-Apron (safer still to wear old / house clothes under the apron)
-Goggles
-Cloth for cleaning up spills
-Bottle of vinegar

Step 1. Mix the olive and coconut oils in a saucepan with a whisk over a low heat until the temperature reaches 60 oC (140 oF).


To make the lye mix, pour the water into a stainless steel or glass bowl placed in a sink in case the contents froth over when you add the caustic soda. wearing protective goggles, gloves, and an apron, add the soda to the water and mix with a wooden spoon until the crystals have dissolved. Leave to cool.

Step 2. Add the the cooled lye mix to the hot oils in the saucepan and stir with a wooden spoon until well mixed. then beat with a metal whisk until the mixture reaches the consistency of thick custard so that a line is visible if drawn across the surface.


Stir in the green clay, spirulina, bran/oatmeal/rolled oats, ans essential oil.


Step 3. Pour or spoon the mix into your moulds. Cover with a cloth and leave for 24 hours. While still soft remove the soap from your mould wearing plastic gloves, and cut into bars using a knife. Arrange on trays and leave to dry out fully and harden this process is called curing and will take atleast 4 weeks. An alternative to plastic or wooden moulds, try using juice or milk cartons, pour or spoon the mixture into the cartons. Wrap the cartons in a large towel and set somewhere warm for 24 hours like the airing cupboard. The cartons will feel warm and will get hot as the mixture neutralizes and turns into soap.  To unmold your soap, peel off the cartons and cut soap into sections for hand soap. Place each bar on a wire rack in a cool, dark place to cure for 4 weeks. After 4 weeks, soap can be buffed with a cotton cloth and wrapped for gifts.

I'm always looking out for new soap recipes, so if you have any suggestions for lye solution based soaps please send them to me to try.

Tuesday, 17 July 2012

Homemade Pore Strips


You know those Biore pore strips you buy at your local high street chemist, about £8, for box of about 6 strips? Today I’m going to teach you how to make your own homemade pore strips courtesy of http://petitelefant.com/how-to-pore-strips/


Ingredients:
•    1 Tablespoon Unflavoured Gelatine
•    1 1/2- 2 Tablespoons Milk (any kind) but I used semi-skimmed which works fine.
From these 2 ingredients, your pores will look like magic.  What’s not to love?


1.    Measure 1 Tablespoon of unflavoured gelatine into a disposable container (if you put say, green jelly on your face, there might be trouble, also use a disposable container, I didn't spent a long time trying to get the glass clean).
2.    Add 1-2 Tablespoons of milk into the gelatine
3.    Until it looks like... well snort
4.    Mix it up, and be quick, until you get a chunky consistency (snort like.  Add more milk if you’re uncomfortable with the amount of chunk.
Microwave the gelatine for about 10-15 seconds.  It will get creamier in the microwave.  Stir that around and start applying it IMMEDIATELY to your nose/face and as evenly as possible.  This stuff hardens up fast so you’ve got to act fast.
Wash your face before you apply.

I chose to put the stuff all over my face because I wanted to.  You can put it wherever your desire, but you need to act fast as this stuff turns to gelatine pronto.

Let it dry for about 15+ minutes.  I waited a lot longer, got distracted by the TV, but you’ll know it’s time when you can’t talk or smile.

Grab whatever you can and start peeling.  This is the gross/fun part.

It’s a good thing you can’t see the photo all that well.  Do this until you’re all peeled and your face will feel like a baby’s bottom, and you won't be able to stop touching it.

Clean, practically hairless, with clean, dirt-free pores.

TTFN

Thursday, 19 April 2012

Glass Jar Project - Lavender Bath Soak

Glass Jar Project - Lavender Bath Soak


So I've recently found a fabulous blog called The Spotted Fox, and it gave me idea about what to do with my ever growing collection of glass jars, that I haven't used. Let the Glass Jars Project begin:

Lavender Bath Soak - (thanks for the inspiration Spotted Fox.)

This is relaxing and soothing way to end the day.

What you’ll need:

-1 part Bicarbonate of Soda
-5 parts Epsom Salts
-1 part dried Lavender Flowers
-5-10 drops Lavender Essential Oil

* Mix all ingredients together by pouring into a large container/a zip-lock baggy and shake, shake, SHAKE. I used a zip-lock baggy.

* Store in your chosen jar

* Tie on some pretty yarn around the jar neck and give as a handmade gift to yourself (if your feeling generous give away as a gift), I'm keeping this one so I didn't beau-ti-fi the jar too much

* Add a few spoonfuls to your next bath, if like me you plan to keep it!

Enjoy

Sunday, 18 March 2012

Mother's Day Pamper Zone

One of the things that my mother had been wanting to do was have a  bit of a pamper in the form of a facial, so that was what she got today. By candlelight and jazz music softely playing in the background.

Step 1 - Remove makeup. (Standard cleansing wipes)
Step 2 - Steam face to open the pores. (Home Facial Steamer - I got mine from Agros) Massage hands and arms with almond oil and creams.
Step 3 - Apply the Sauna Mask. (Standard Mask bought from a high street pharmacy)
Step 4 - Remove the Mask and moisturise skin.

The whole pampering did involve a bit of step up and clean up, but  overall was a storming success in the mother pleasing scales.

Try it next year or if you aren't based in the UK, try it out when it comes up. Dad's might even like it for Father's Day.

Thursday, 2 December 2010

A recipe for the smell of Christmas

I don't know Christmas is like for the rest of the population but in my home Christmas has always had a smell. Of fresh pine, cinnamon, nutmeg, cloves and citrus which is hard to create without the fresh pine tree in the house and the baking of my mothers black rum fruit cake.

This year we are doing without both, the pets behaviour last year means that there is to be no tree. Lack of time means no cake! So...

I tried, like the alchemists of old created a simple recipe.

Fill one small saucepan with water and put on the stove top.
Place two small nutmeg pods and 1tsp. of cloves in a mortar and pestle and bash.
Sprinkle the contents of the pestle into the saucepan.
Add a 1/4 of a stick of cinnamon to the saucepan.
Take two limes or lemons or oranges, slice one up and put into the saucepan, with the other cut in half and squeeze the juice into the saucepan.
Bring the entire measure to the boil.

At this point you have two options, allow to boil continuously adding more water as necessary.
or turn off the fire and relight periodically.

The mixture needs to be changed when it turns chocolate brown or after about 2 to 3 days.

And all cheaper an a Glade candle.